
Hi! Welcome to Hoory AI! In this user guide, we'll help you create a macro in Hoory AI.
What is a Macro?
Before we start, let's understand what a macro is:
A macro is a set of saved actions that you can pre-determine and use whenever needed. It streamlines repetitive tasks, saving you time and effort.
Creating a Macro
- Go to Settings → Macros → "Add a new macro."

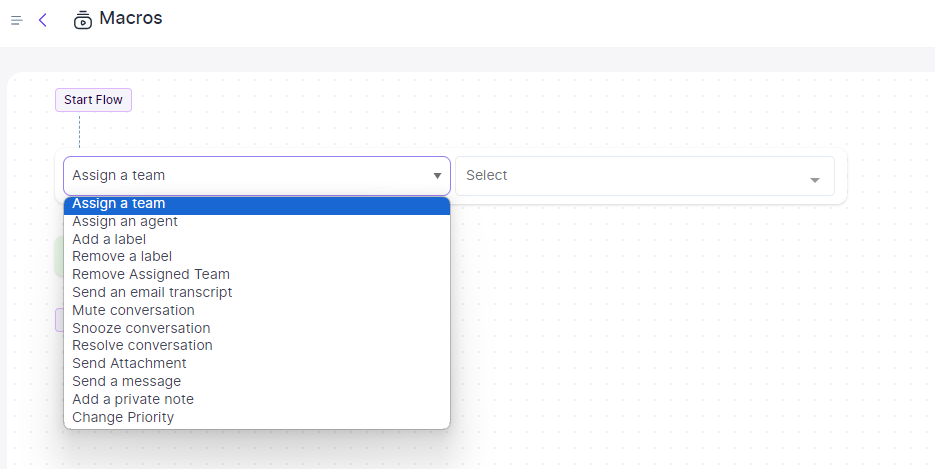
2. Create a flow of actions to be performed when the macro is executed.
3. Name your macro for internal reference.

4. Select the necessary actions from the dropdown menu. Actions can include labeling, assigning tasks, sending messages, and more.
5. Define a visibility status for your macro. Set to "Private" for personal use or "Public" for team use.

6. Click "Save macro" at the bottom.
Executing the Macro
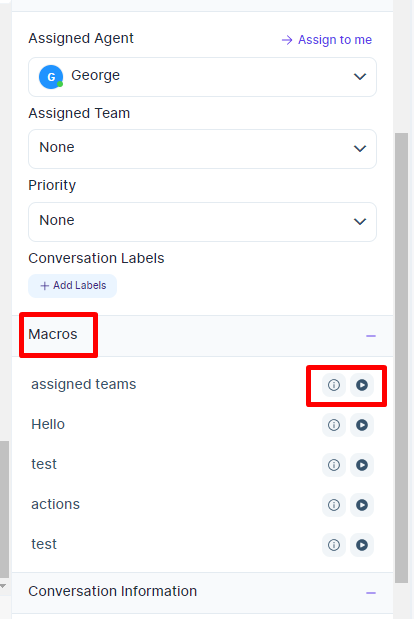
- Locate Macros Section:
- In the right sidebar of your chat window, find the "Macros" section.
- Click the plus sign to expand and view the list of macros.
2. Preview and Execute:
- Preview the macro by clicking the "i" icon.
- Execute the macro by clicking the play button.
Editing or Deleting a Macro
- To edit or delete macros, go to Settings → Macros. Find the macro and use the edit or delete button next to it.

That’s it. Easy as that!
Wrapping up, as you learn the fundamentals, remember there's so much more to explore with Hoory AI. The journey doesn't end here—keep experimenting, learning, and innovating with your AI assistant to unlock its full potential.