
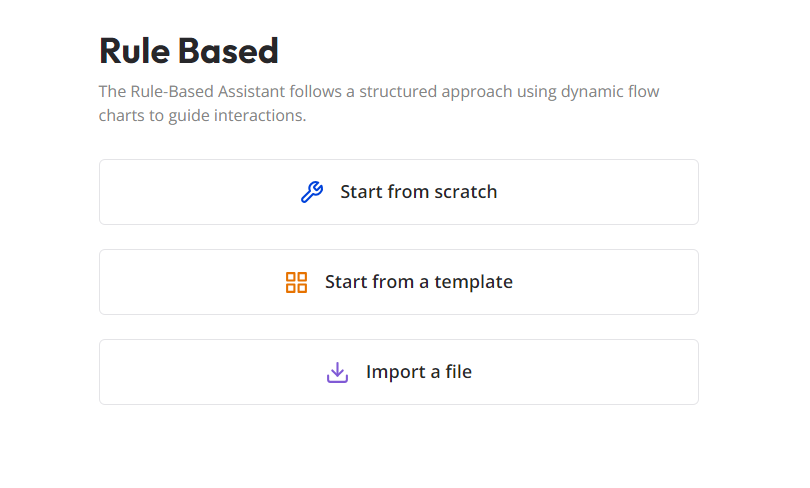
The Rule-Based Assistant follows a structured approach, using dynamic flow charts to guide user interactions through pre-defined conversation flows.
The training options are as follows:
- Train the assistant from scratch to customize its behavior entirely.
- Use a pre-existing template to expedite the development process.
- Import an unfinished file to continue working on a previously saved project.
Training From Scratch
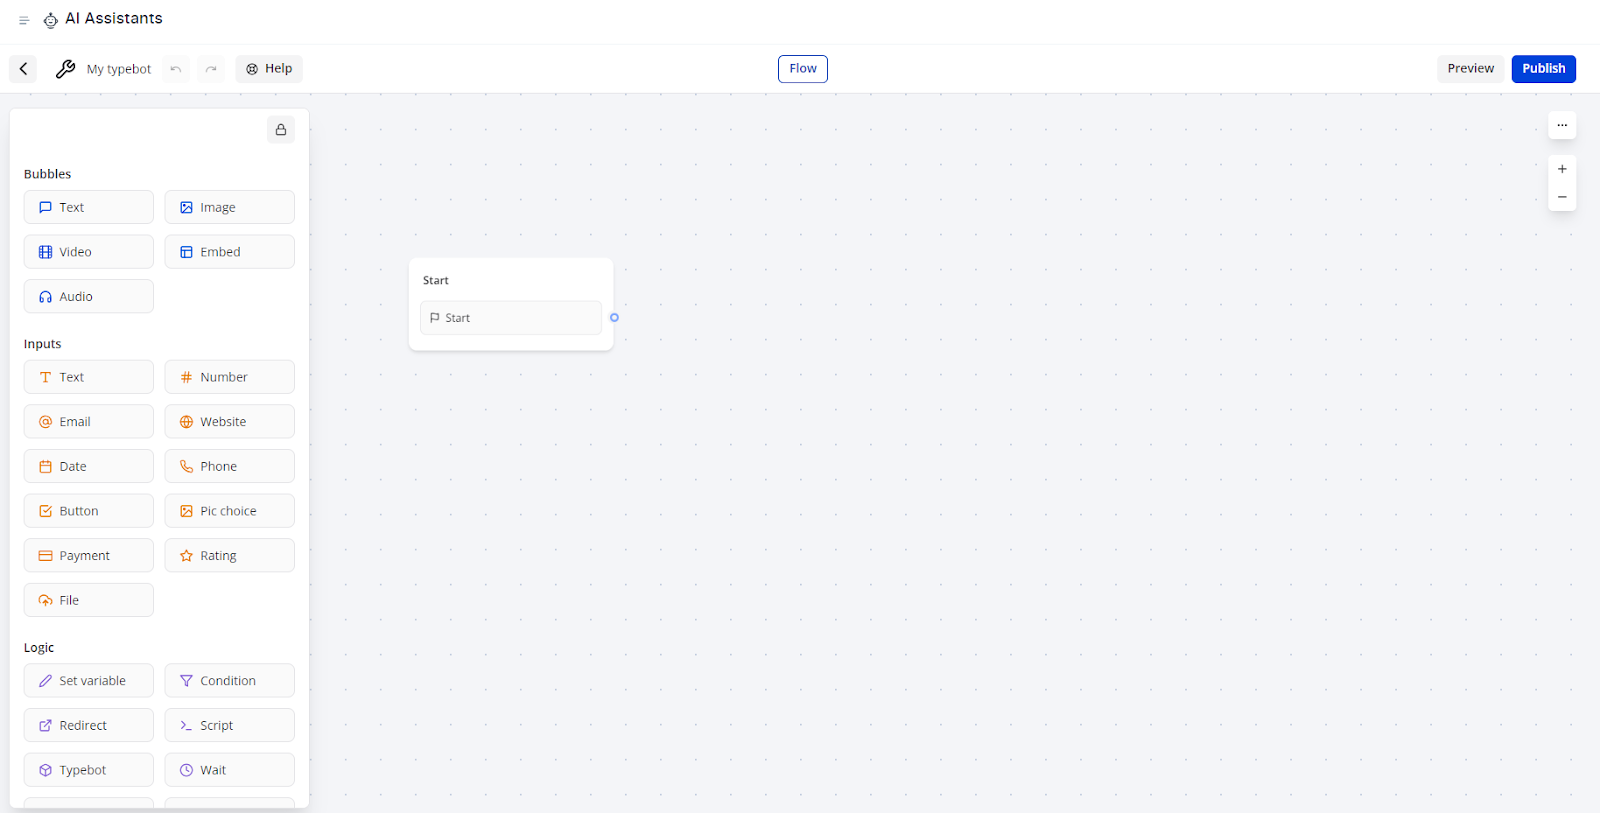
To get started with training your Rule-Based AI Assistant from scratch, follow these steps:
- Log into your Hoory AI account.
- Select AI Assistants from the left sidebar.
- Create a new assistant.
- Then, choose "Start from scratch" in the rule-based AI assistant section.
- This action will provide ample space for you to build a conversation flow using a range of versatile tools located in the left sidebar. As you can see, the starting point is already given.
Now, let's create a greeting message and get to know our user while collecting their name. To do that:
- Drag and drop a text bubble from the left sidebar.
- Give a title to the text bubble. [The title should be "Name"]
- Type in a greeting message. [The greeting message should be: "Welcome aboard! Before we get started, could you tell me your name?"]. By the way, if you want this text to be sent out in two parts, take another text bubble and attach it to this thread. Otherwise, it will be sent in one message.
- Next, add an input text so the user can enter their answer.
- Also, don't forget to link these two sections with an arrow. [Attach Start to Name]
Now, let's tell the user about the company. To do that:
- Drag and drop another text bubble.
- Name it as Company and enter the information that you want to share about your company. [The text should be: Hoory is an AI-powered customer support assistant that runs 24/7, streamlining customer requests at scale.]
- Let's ask the user their field of expertise or interest. [The question should be: Let me ask you what you specialize in to understand how Hoory AI can best serve your needs. Do you work for a specific company?]
- Now, it's the user's turn. Grab a text input and left-click on it to save the answer in a variable. If you already have the variable, choose it from the dropdown; otherwise, just type in, and you'll see the “Create” button.
By the way, you can delete and duplicate the text bubbles and inputs, by right-clicking on it and selecting the respective option.
Getting back to the conversation, we now have the user’s name and workplace. Now, we can inquire about their main purpose of using Hoory AI.
To make the answering process easier for the user, this time we can give multiple options to choose from. To do that:
- Grab a button input and name it Usage Purpose.
- Add a text bubble at the top to insert your question [the question should be: "What's your primary goal of using Hoory AI?"]
Then add as many button inputs as you have options, which in this case are four. Copy and paste the options.
The options can be:
- Automated customer support
- Enhanced ticket management
- Multilingual Support
- Support scalability
- Faster response time
- Click on each option and activate the multiple-choice option so the user can select a few, if necessary.
- You can also provide a blank text input in case the user has a different answer that they didn't find among the options. To do that, take a text bubble, place it at the end of the options, and set the placeholder text as "Other."
Now, you have quite a lot of information from your users. As a finale, you can add a goodbye message with another text bubble.
Here's what the conversation map looks like.

Great! The user onboarding conversation flow is ready to go. Once you create the first draft of your conversation flow, you can preview it by clicking the "Preview" button in the top left corner. Then, if everything looks good, you can click "Publish," and the flow will activate. Another option is to export the flow by clicking the three dots right under the Publish button and selecting "Export flow."

That's it. Now, you know how to train your Rule-Based AI Assistant from scratch and have it independently handle user queries, ensuring a high customer satisfaction score.