
Hi! Welcome to Hoory AI. In this user guide, we'll walk you through the simple steps of creating an email-based channel on Hoory AI.
Let's get started.
- Navigate to Settings → Channels → Add Channel.

2. Select Email from the list of available channels.

3. Click "Other Providers."

4. Type in the channel name, i.e., how you'd like to address this channel, your support email address, and click the “Create Email Channel” button.

5. Add agents to your email channel.
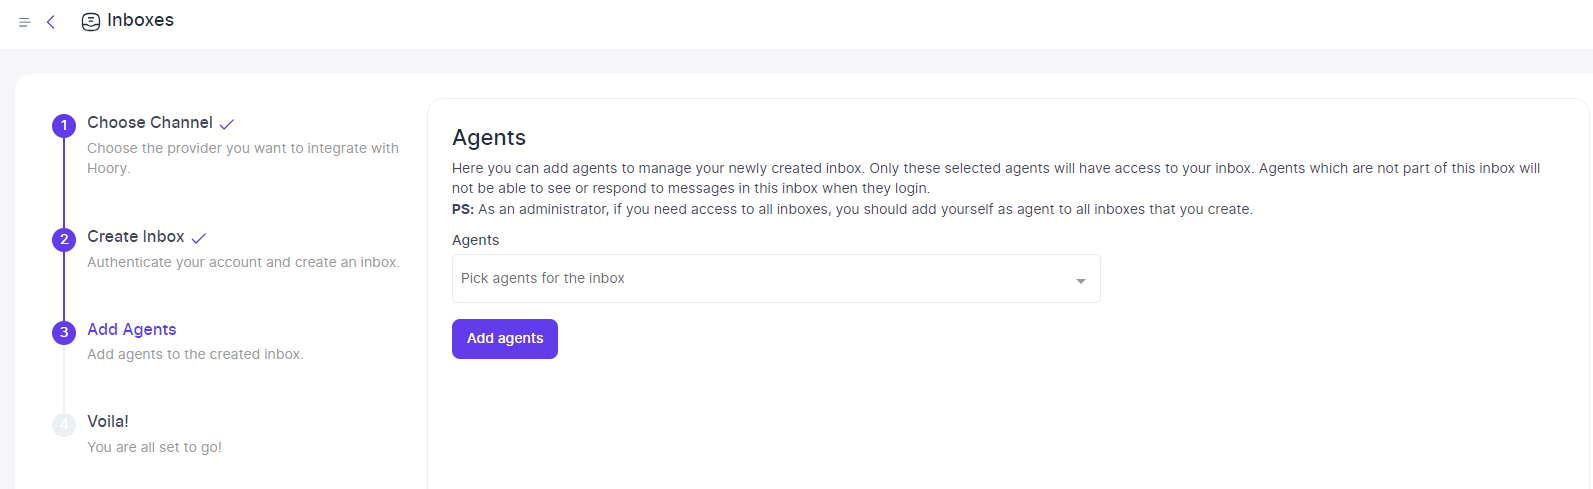
6. The email channel is ready!

7. Configure your email settings by navigating to Settings → Channels → Channel Settings → Configuration.
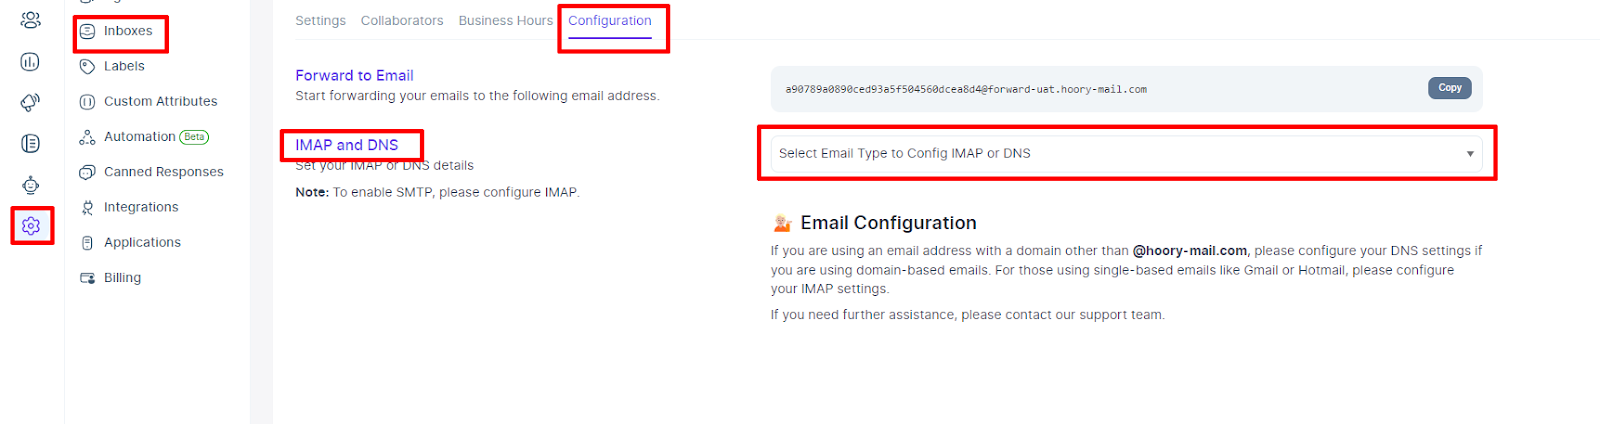
8. Select the email type to configure IMAP or DNS. If you use an email address with a domain other than your support email address, please configure your DNS settings for domain-based emails. For those using single-based emails like Gmail or Hotmail, please configure your IMAP settings.
- Single Sender Verification
- Domain Authentication
Congratulations! You have successfully created an email-based channel. Whenever a customer sends an email, you will be able to see and reply to it from your Hoory AI dashboard.