
Hi! Welcome to Hoory AI. In this user guide, we'll walk you through the simple steps of creating an API-based channel on Hoory AI.
Let's get started.
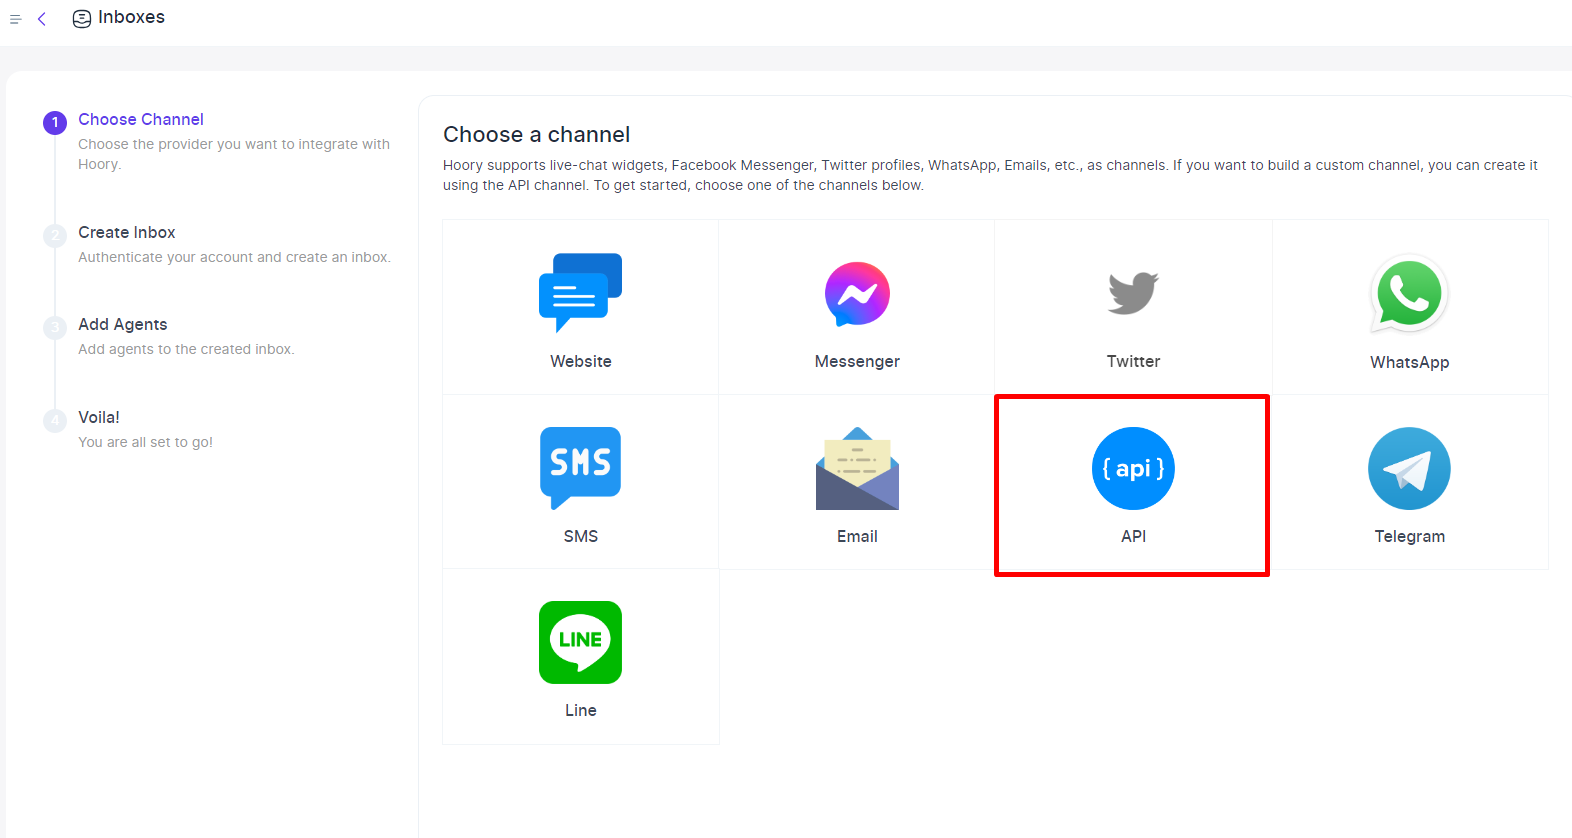
- Navigate to Settings → Channels → "Add Channel" button.

2. Select API from the list of available channels.
3. Enter a channel name and a Webhook URL. You need to configure the URL where you want to receive callbacks on events.
4. Click "Create API Channel."

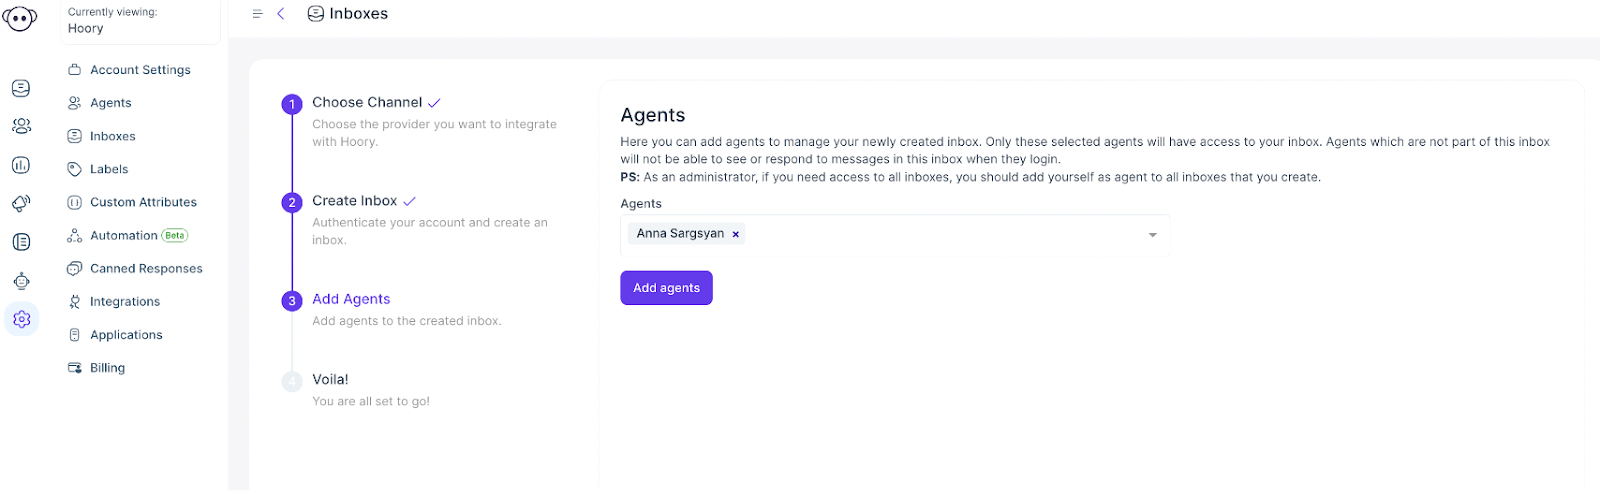
5. Add agents to your API-based channel.
 Sending and Receiving Messages
To send a message in your API channel, first you have to create a contact.
To create a contact, send an HTTP request to Hoory AI's public API with your channel identifier.

chann_identifier: It is a unique identifier for the channel, which can be found in the Configuration Tab of your Channel Settings.
And your contact information.
Now that you have a contact, you need to create a conversation.
To create a conversation, send another request to Hoory AI's API with channel_identifier and contact_identifier.

After creating both the contact and the conversation, you can send a message to the conversation on behalf of the contact.
To create a message, send a request to Hoory AI's public API endpoint, With channel_identifer and conversation ID ( which you obtained from create conversation API call)
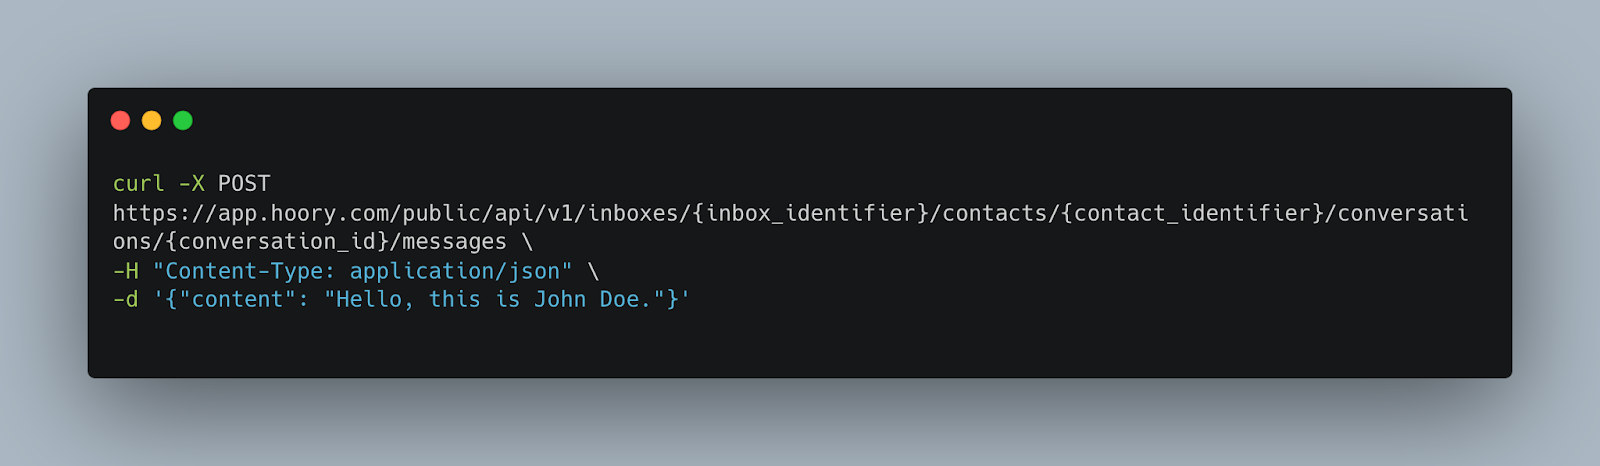
Then, insert the content of the message. Note that markdown format is supported here.
Hoory AI supports the following webhook events. To check all the events follow this link: https://docs.hoory.com/product/others/webhook-events/#webhook-events
That's it!
Congratulations! You have successfully created an API-based channel. Whenever a customer sends a message, you will be able to see and reply to it from your Hoory AI dashboard.
For more technical information, check out our documentation.
****