A customer group is an arrangement of customers based on particular characteristics or behaviors, including location, loyalty status, or recent purchases. These categories are used to better match each segment demands and preferences by adapting marketing campaigns, promotions, and customer experiences.
The Customer Groups section contains the list of customer groups in your store and the number of customers in each respective group.

Here, you can:
- create a new group;
- search for corresponding customer groups;
- sort the groups.
Managing Groups
Here, you can create customer groups, view details about the default customer group, and make changes to any custom groups you have created, including editing or deleting them.
By default, there are two Groups available:
- Guest: Customers who have not signed up during the purchase.
- Registered: Customers who have signed in during the purchase.
- Legal Person: Customers that are registered legal entities, such as businesses, corporations, non-profits, or government organizations.
Once the customer places the order, the customer's relevant group information is recorded and stored on the Groups page.
Tip: To delete or edit Groups, select the group from the list, click the Dotted Menu, and opt for the appropriate option.
Note: You can not delete or edit the Default Groups.
Adding a New Customer Group
You can add a new group and assign customers to that group who share similar characteristics. This enables more effective communication with the customers, for instance, sending targeted emails to specific groups and offering them specific discounts.
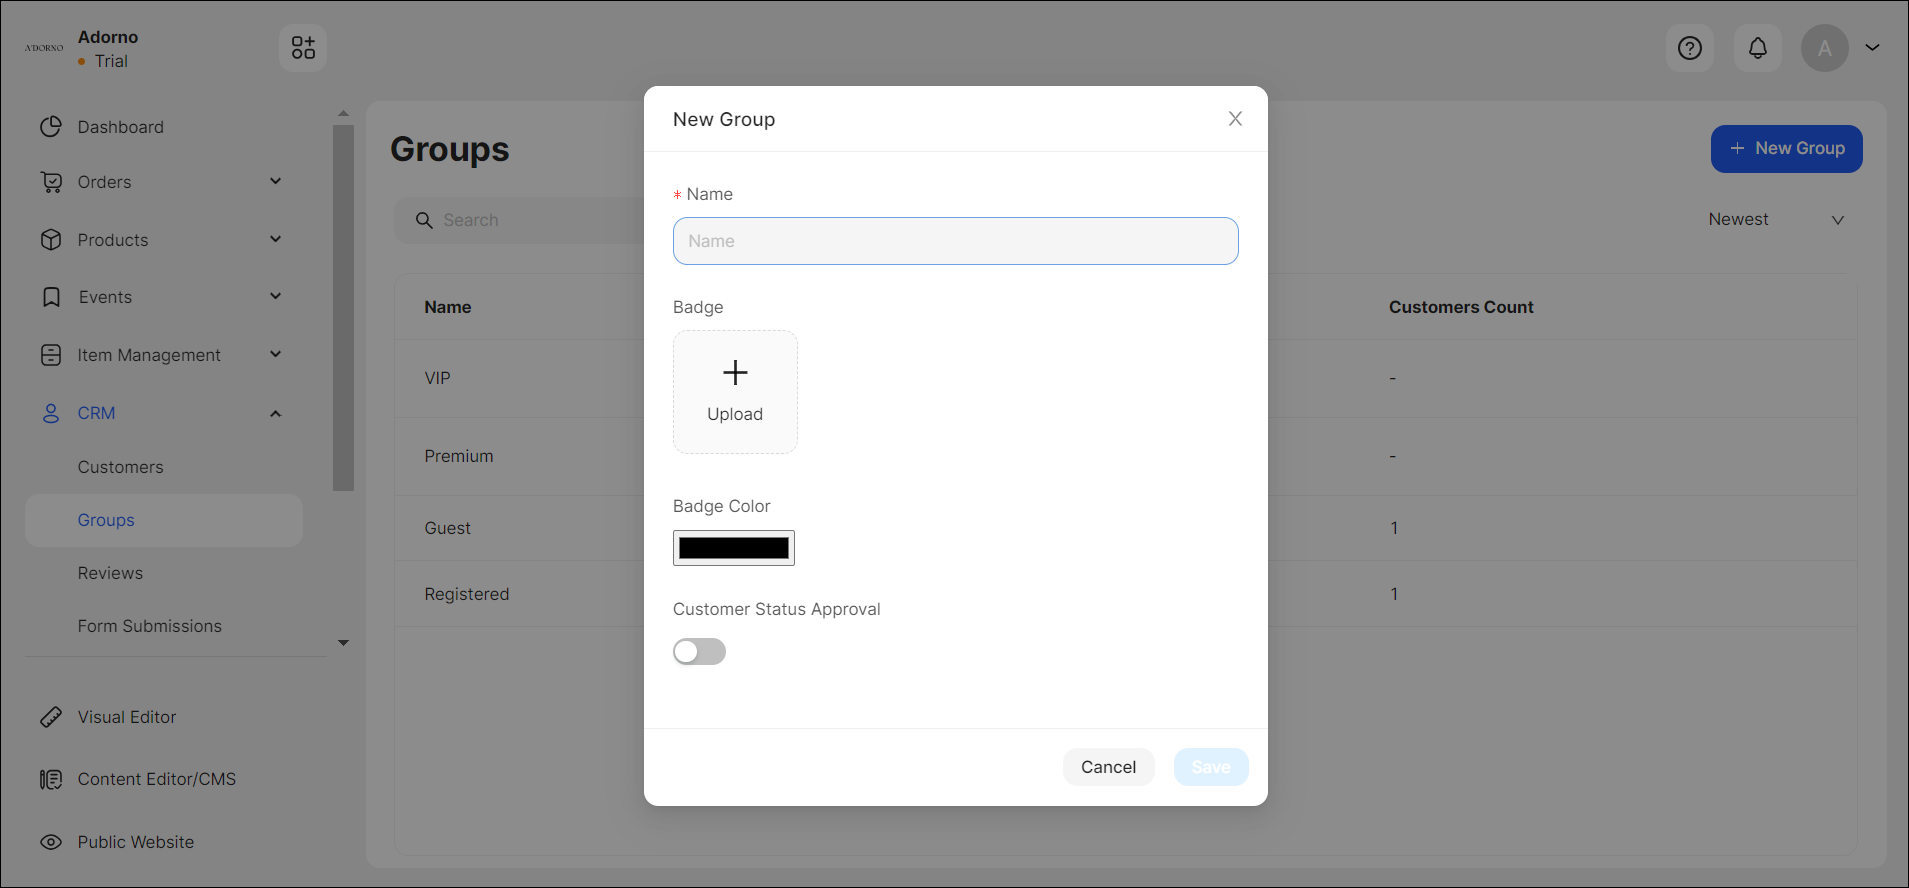
To add a new customer group to your store:
- Click + New Group at the upper right of the page.
- Type the name of the group.
- Upload a Badge if there is such for the newly created group. The file format must be SVG. When the customer from this group submits a product review, the Badge image is displayed next to their name in the public mode.
- Set the Badge color, if required.
- Enable the toggle, which requires status approval from the customer.
- Click Save.

For instance, you can offer promotions to a certain number of Guest customers and assign them as Registered customers in the store.
Here you can create a Group; however, to assign customers to that Group, you need to go to the Customers section (see Customers).
💡 If you have questions or concerns, contact us directly via the Live Chat box in the lower right corner. Our Support Team will provide you with top-notch quality support 24/7.